
Burnsville Wood Flooring builds and refinishes hardwood stairs in Burnsville, MN, serving surrounding cities including Apple Valley, Savage, Bloomington, Eagan, Richfield. Over 20+ years the split-level and two-story stock across the south metro has sent us a great deal of stair work: carpeted flights being converted to wood, treads worn through at the nosing, and staircases that have to meet a new floor without announcing where one stops and the other starts.
Stairs are the hardest finish carpentry in a flooring job and the least forgiving. There is no drum sander, no forgiving field of boards to hide a variation in, and every cut lands somewhere a person’s eye passes at close range every day. A tread that is an eighth of an inch out of parallel with the one below it is visible from the landing, and it stays visible for as long as the house stands.
The other thing worth saying plainly is where our work stops. Treads, risers, nosings, skirt returns and the finish on all of them are interior finish work and they are ours. Rebuilding a stringer, moving a flight, or altering the structure a staircase sits in is structural carpentry and a different trade, and we will say so rather than take it on.
Stair Parts and How They Fit Together
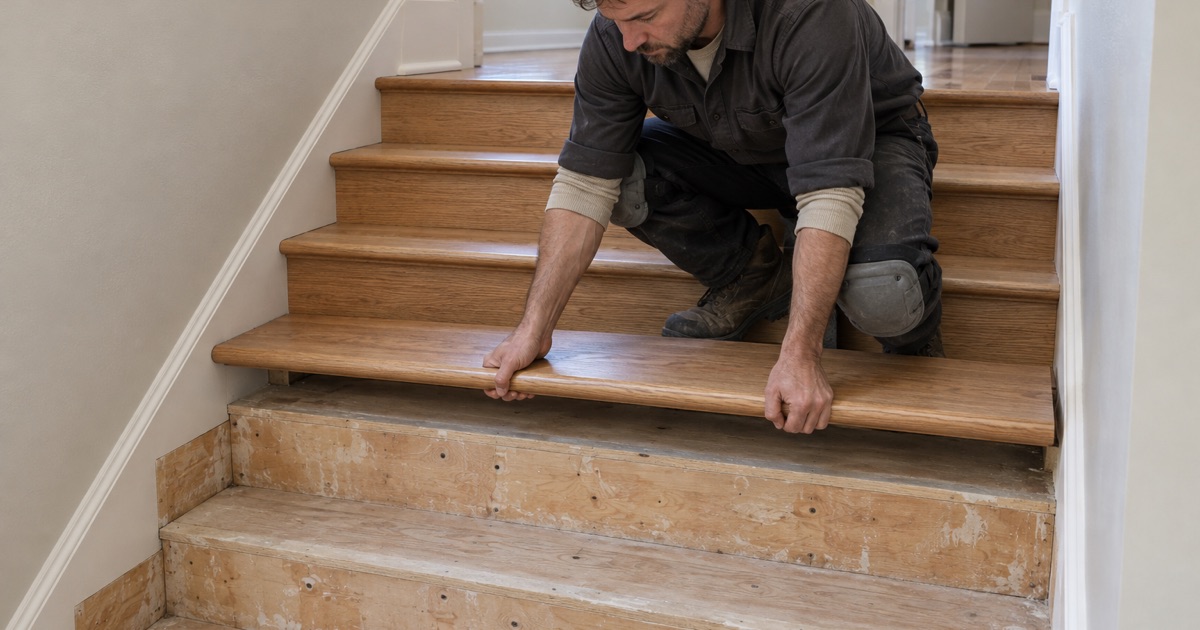
Treads, Risers and the Nosing Profile
The tread is the surface you step on, the riser is the vertical face between treads, and the nosing is the projecting front edge that overhangs the riser below. The nosing profile is the single most visible detail on a staircase — square, eased, or full bullnose — and it is what a retread most often gets wrong by using stock that does not match the rest of the house.
Stringers, Skirtboards and Where Finish Work Stops
Stringers are the structural members that carry the treads, and they are not what we touch. The skirtboard is the trim running up the wall alongside the flight, scribed to the tread and riser profile, and it is finish work. Getting the skirt right is what makes a retread look original rather than applied, because it is the joint the eye follows from the bottom of the flight to the top.
Landings, Reducers and Meeting the Floor Above
Where a staircase meets the floor at top or bottom, the transition has to be planned rather than improvised. A landing gets flooring laid to match the run, with a nosing at its edge that continues the profile of the treads. Where the stair floor and the adjoining floor are different thicknesses or different materials, a reducer or a threshold handles the change without creating a lip somebody catches a toe on.
Carpet-to-Wood Stair Conversions
What Removal Reveals, and What It Costs
Under carpet there is normally construction-grade stock: a softwood tread with no finished nosing, a riser of the same, staples every few inches and tack strip nail holes along both edges. Occasionally there is oak worth saving, and we check before assuming. Far more often the honest answer after the first tread comes up is that the visible surfaces are being replaced, and that is priced before we start rather than discovered halfway.
Retreading Over the Existing Structure
A retread caps the existing rough treads and risers with finished hardwood, keeping the flight’s structure exactly as it is. It is the standard approach because it is faster, quieter and does not disturb anything structural. The engineering that matters is thickness: what is removed and what is added must reconcile so riser heights stay consistent up the flight and within the variation building code permits.
Matching New Stairs to the Floor They Land On
Stair treads are viewed at eye level and on end grain, so a species mismatch that would pass unnoticed in a floor is obvious here. We match species, cut and grade to the adjoining floor, then test stain on a piece of the actual tread stock against a sanded patch of the actual floor. On an older floor that has ambered under years of finish, the new stain is adjusted to meet it.
Refinishing Existing Hardwood Stairs
Sanding a Flight Without a Drum Sander
Stairs are sanded with edgers, orbital sanders, detail sanders and by hand, one tread and one riser at a time, working through the grit sequence the same way a floor does. It is slow, and there is no shortcut that does not show. The inside corners where tread meets riser meets skirt are the places where a rushed job announces itself, because that is where old finish survives if the hand work was skipped.
Finish Choice and Sheen on a Stair
Stairs take concentrated wear on a small area, particularly at the nosing, so the finish gets chosen for durability first. Sheen is worth thinking about separately: a high-gloss tread shows every scuff and reads as slippery even where it is not, while a satin or matte finish hides traffic and is what most people are happier living with. We finish a sample tread so you can look at it in the stairwell’s own light.
Loose Treads, Squeaks and Movement Underfoot
A stair squeak is a tread moving against a riser or against its housing in the stringer, usually because a wedge or glue block has dried out and let go. Where there is access from underneath — an unfinished basement stair is the common case — the fix is glue blocks and wedges from below, invisible from the top. Where there is not, it is done from the face and filled.
Our Step-by-Step Hardwood Stair Process
Step 1: Measuring the Flight and Reconciling Thickness
Every tread and riser in the flight is measured, along with the existing riser heights and tread depths, before anything is ordered. That is where a build-up problem gets caught: adding a finished tread over an existing one changes a riser height, and it has to be resolved across the whole flight rather than one step at a time. The material list comes out of those measurements.
Step 2: Removal, Preparation and Substrate Repair
Carpet, pad, tack strip and staples come out, and the rough treads are inspected rather than immediately covered. Loose treads are re-secured to the stringers, glue blocks are replaced where they have failed, and anything soft or split is dealt with now. Covering a moving tread with a finished one produces a squeak that can only be fixed by taking the new work apart.
Step 3: Fitting Treads, Risers and Skirt Returns
Each tread is scribed to the walls it meets, because stairwell walls are almost never parallel and almost never square. Risers go in first, treads over them, and returns are mitered where the flight is open on one side. Fasteners are set and filled, and adhesive does most of the holding, since a tread fixed by nails alone is a squeak waiting for the heating season.
Step 4: Sanding, Stain and the Finish Schedule
The flight is sanded through the grit sequence by hand and with detail sanders, stained to the approved sample, then sealed and topcoated on the schedule quoted. We hand back two dates as we do on a floor: when the treads take stocking feet, and when the finish has cured enough for shoes, pets and traffic. On a single-staircase house, those dates are the plan the whole job is built around.
- 20+ Years Experience
- Free Written Estimates
- Dust Containment on Every Sand