
Burnsville Wood Flooring has been doing hardwood floor refinishing in Burnsville, MN for 20+ years, serving surrounding cities including Apple Valley, Savage, Bloomington, Eagan, Richfield. We take worn oak, maple and walnut floors back to bare wood, correct what sanding can correct, and put down a finish chosen for the house rather than for our own convenience. Every quote leaves with a written grit sequence and finish schedule attached to it.
Refinishing is the one flooring job where the quote and the result can diverge without anyone lying. Two contractors can both say “sand and three coats” and mean very different things: how many grits, whether the edges get the same sequence as the field, whether the sealer is compatible with the topcoat, and how long the floor sits between coats. Putting the sequence in writing is what makes those quotes comparable.
We also start with the moisture meter and the hygrometer rather than the sander. A floor that is cupped because something under it is wet will be cupped again three months after it is sanded flat, and a floor gapped by a house sitting at eighteen percent relative humidity in February is not a floor with a finish problem. Finding that out before the machines come off the truck is most of the value.
Signs a Floor Needs a Full Refinish Rather Than a Recoat
Wear Through to Bare Wood in the Traffic Lanes
Finish wears in lanes — the path from the garage door to the kitchen, the pivot in front of the sink, the landing at the bottom of the stairs. Once those lanes are down to raw wood, the wood itself is taking abrasion and absorbing whatever gets spilled on it. An abrasive screen cannot rebuild that, so a recoat over it leaves a visible ghost of the lane under the new finish.
Stains That Have Reached the Wood Rather Than the Finish
A water ring that wipes away with the finish is a finish problem. A black spot is usually urine that reacted with the tannins in the wood, and a gray patch is oxidation of the exposed fiber itself. Both live below the finish layer, so both need the sander. We test one spot before promising the whole floor, because some black staining runs deeper than the sanding budget allows.
Flatness, Overwood and Old Sanding Marks
Boards that sit slightly proud of their neighbors — overwood — catch light and catch feet, and a recoat preserves the problem under a new sheen. Old drum marks and edger swirl from a previous refinish do the same thing. A full sand is the only pass that resets the plane of the floor, which is also why it is the pass that has to be done carefully.
The Sanding Sequence and What Each Pass Removes
The Thirty-Six Grit Cut That Does the Real Work
The first pass with a thirty-six grit is the one that removes the old finish, levels overwood, and takes out the deepest damage the floor is going to give up. It is also the pass that spends the most wood, which is why it goes on the quote as a decision rather than a default. A lightly worn floor may start at a finer grit and keep years of life in reserve.
Fifty and Eighty Grit, and Why Neither Gets Skipped
Each grit exists to erase the scratch pattern the previous one left, not to polish. Jumping from thirty-six straight to eighty leaves the coarse scratch in place, invisible on bare wood and glaringly obvious the moment stain or finish goes over it. The thirty-six, fifty and eighty sequence appears on our quotes for exactly this reason: it is checkable, and skipping a step is the cheapest corner in the trade to cut.
The Edger, the Buffer and What a Drum Sander Cannot Reach
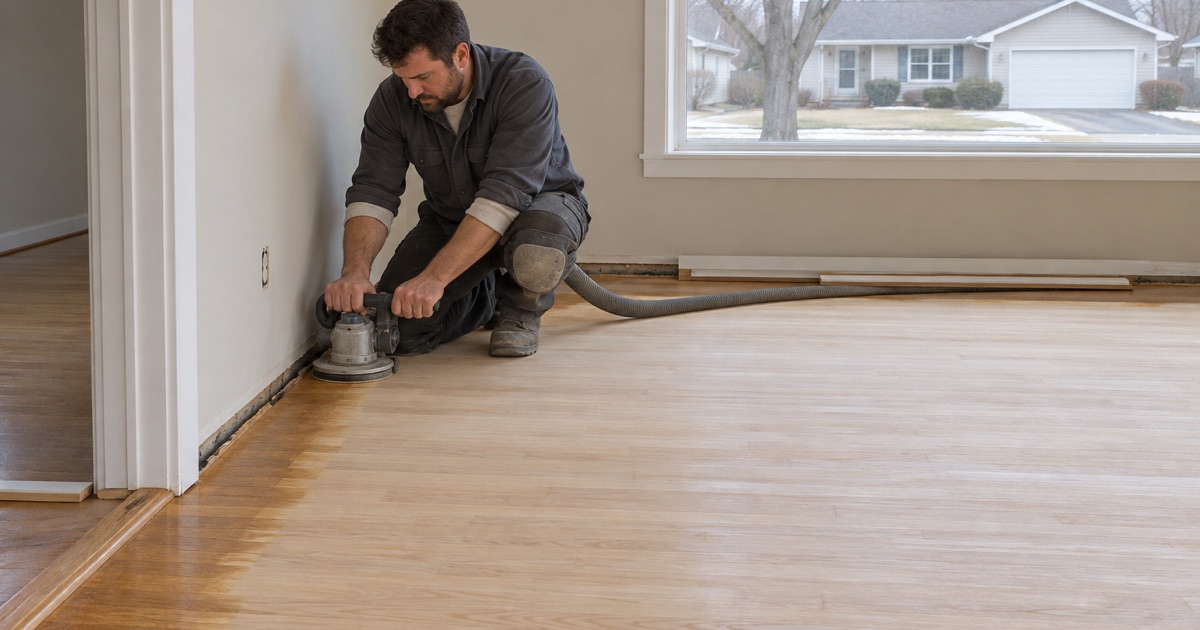
A drum sander cannot get within a few inches of a wall, so the perimeter, the closets and the area under the toe kick are done with an edger. An edger cuts in a different direction than the drum and leaves its own signature. The buffer with an abrasive screen is what blends the two so the border does not read as a picture frame around the room once the finish is on.
Choosing a Finish for a Minnesota House
Waterborne Polyurethane and Fast Return to Use
Waterborne polyurethane dries clear and stays clear, which keeps a white oak floor pale and keeps a stain color exactly where you left it. It is also the fastest route back into the house, because coats can go on the same day. In a winter refinish where windows stay shut, its lower odor is not a small consideration — it is often the deciding one.
Oil-Modified Polyurethane and the Amber It Adds
Oil-modified polyurethane goes on with a warm cast and continues to amber for years afterward. On red oak and on older houses with existing woodwork, that warmth is frequently the point. On a gray or pale floor it is a slow-motion problem, because the color you approved is not the color you will have in five years. We say which way a given color will move before it is chosen.
Hardwax Oil and Choosing a Sheen Level
Hardwax oil penetrates the wood instead of building a film on top of it, so a scuff can be spot-repaired in a small area rather than triggering a recoat of the whole room. It asks for periodic maintenance in exchange. Sheen is a separate decision from chemistry: a matte finish hides dust and micro-scratching in a busy house, while a satin or semi-gloss shows both and shows the grain better.
Our Step-by-Step Hardwood Floor Refinishing Process
Step 1: Moisture Readings and a Written Scope
Before anything is quoted, we take a hygrometer reading of the room and moisture meter readings of the flooring and the subfloor. Those numbers go on the estimate along with the grit sequence, the sealer, the number of topcoats and the sheen. If the readings say the floor’s problem is the house rather than the finish, we tell you that instead of selling a refinish.
Step 2: Containment, Removal and Preparation
Furniture comes out, base shoe comes off where the edges need it, and doorways to rooms outside the scope get sealed. Protruding fasteners are set, loose boards are re-secured, and anything that needs replacing is replaced now — sanding a board you intend to remove is wasted material. Containment goes on the drum sander, the edger and the buffer before the first pass.
Step 3: The Grit Sequence, Field and Edges Together
The field and the perimeter run the same sequence, one grit at a time, with the buffer blending between them. We vacuum between passes rather than only at the end, because grit carried from a coarse pass into a fine one puts a stray deep scratch exactly where nobody wants it. The floor is inspected in raking light before any finish goes down.
Step 4: Stain Tested on Your Own Floor
Candidate colors go on a sanded panel of your actual floor, not on a showroom board of somebody else’s wood. You look at them in your own light, at the hour you actually use the room, and against the trim and cabinets they have to live with. Nothing gets committed until that choice is made, because stain on the full floor is not reversible without another full sand.
Step 5: Sealer, Topcoats and the Difference Between Dry and Cure
The sealer goes down first, then the topcoats on the schedule you were quoted, buffed between coats where the finish system calls for it. When we hand the floor back you get two dates: when it can take stocking feet, and when the finish has cured enough for rugs, furniture pads and pet claws. Confusing those two dates is the single most common way a new finish gets marked in its first week.
- 20+ Years Experience
- Free Written Estimates
- Dust Containment on Every Sand