
Burnsville Wood Flooring handles hardwood floor repair in Burnsville, MN, serving surrounding cities including Apple Valley, Savage, Bloomington, Eagan, Richfield. Twenty-plus years of Minnesota floors means most of what walks through the door is something we have seen before: a cupped kitchen, a stair landing that announces every step, a patch from a removed wall that never disappeared, boards gone soft under a dishwasher nobody noticed leaking.
Repair work rewards diagnosis far more than it rewards speed. The same symptom has several causes, and the wrong one costs boards that were fine. Cupping might be a crawlspace, a humidifier or a slab; a hollow spot might be failed adhesive or a low subfloor that was never leveled; a squeak might be fixable from the basement in an hour or might need work from the face of the floor. We find out which before quoting.
So every repair here starts with a moisture meter and a look underneath wherever there is access. Where the cause is still active, fixing the wood first just buys a second repair. And where a floor has been wet, the documentation happens before the demolition — photographs, readings and the measured extent of the affected area, recorded while the evidence is still nailed down.
Reading What a Damaged Floor Is Telling You
Cupping, Crowning and Buckling as a Moisture Map
Edges high and center low means the underside is taking on more moisture than the top, and the shape of the affected area usually points straight at the source. Crowning — center high — most often follows a floor sanded flat while it was still cupped, which is a repair that created a second problem. Buckling means the boards had nowhere left to expand and lifted off the subfloor entirely.
Squeaks, and Whether the Fix Comes From Below or Above
With basement or crawlspace access, most squeaks are solved invisibly: blocking between joists, shims into a gap, or screws driven up into the subfloor from underneath with nothing showing on the finished side. Without access, the work happens from the face and involves fasteners set below the surface and filled. The access question decides both the cost and the cosmetic outcome, so we answer it on the first visit.
Boards That Sound Hollow Underfoot
A hollow note is flooring that has separated from what is beneath it. On a glue-down, that is adhesive that released; on a nail-down, staples or cleats that lost their grip in dried-out subfloor; on any floor, a low spot the installer filled with hope rather than with self-leveling underlayment. We map the extent, open the smallest area that answers the question, and re-bed or re-fasten rather than replacing sound wood.
Board Replacement and Patching Techniques
Weaving a Patch Into the Surrounding Field
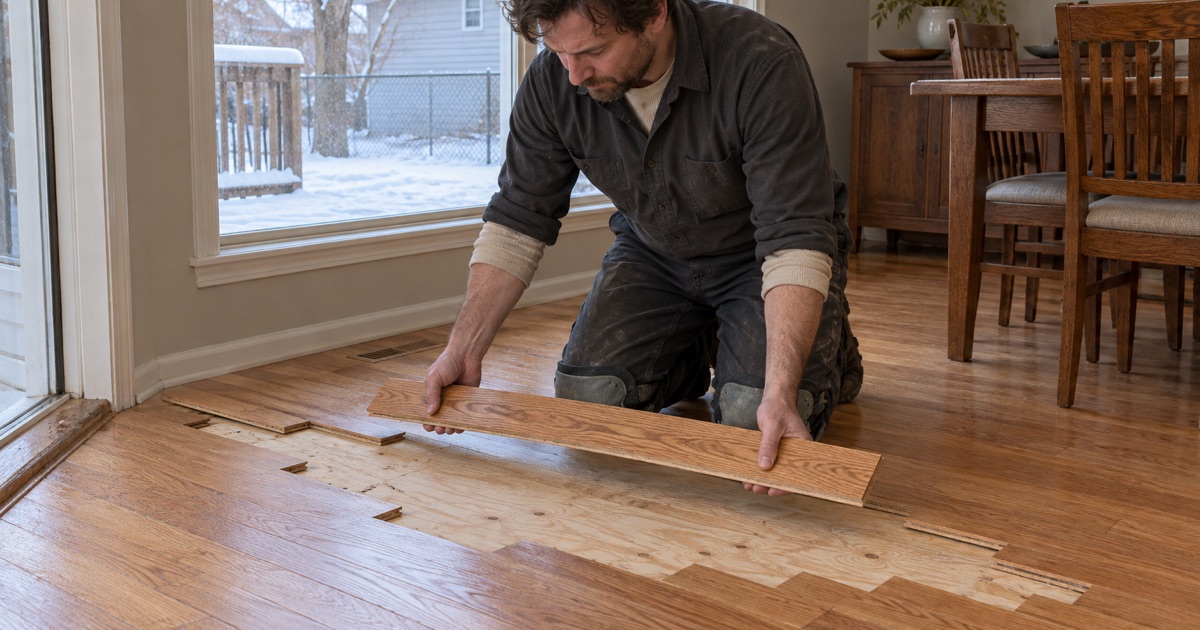
A rectangular patch dropped into a floor reads as a rectangular patch forever, no matter how good the joinery is. We stagger the replacement board ends into the existing field so no two seams line up across the run, matching the pattern the original installer used. Done properly, the eye has nothing to catch on, and after the area is sanded and finished as one surface the repair stops existing visually.
The Dutchman Patch for Localized Damage
Where damage sits in the middle of a board — a burn, a deep gouge, an old pipe penetration — replacing the entire board can mean disturbing a dozen neighbors to get it out. A dutchman patch cuts a clean geometric section out of the damaged board and fits a matching piece into it with the grain running the same direction. It is slower per square inch and far less disruptive overall.
Matching a Discontinued or Unavailable Floor
Prefinished floors go out of production constantly, and a discontinued line rarely gives you species, width, grade, bevel and finish all at once. The workaround that succeeds most often is harvesting: boards lifted from inside a closet, from beneath a refrigerator, or from a room being retiled go into the visible field, and the imperfect new material goes where it will never be looked at.
Repairs Sanding Will Not Solve
Floors Too Thin to Sand Again
Solid flooring has usable wood only down to the tongue, and engineered flooring only down to the top of its core. Where a previous refinish already spent that budget, aggressive sanding produces a sand-through — bare core or exposed fastener heads — and there is no recovering it. We measure at a vent cut or a threshold first, and where the number is short, board replacement becomes the repair rather than the sander.
Pet Stains and Black Spots in the Wood
Gray weathering and surface scratching come out with the first grit. Black spotting is a different thing entirely: urine that soaked past the finish and reacted with the tannins in the wood, sometimes reaching the subfloor beneath. Sanding lightens it and rarely removes it. We test a spot honestly before promising a result, then price board replacement for the areas where the color will not lift.
Insect Damage and Its Source
Powderpost beetle activity is identified by the emergence holes and the fine frass beneath them, and the species of the floor is a strong clue on its own since these beetles ignore softwoods. Replacing the visibly damaged boards without establishing where the infestation is living leaves the rest of the floor exposed. Identification comes before removal, and treatment is a separate trade from carpentry.
Our Step-by-Step Hardwood Floor Repair Process
Step 1: Diagnosis, Readings and Access
We meter the flooring and the subfloor, take a hygrometer reading for the room, and get underneath wherever the house allows it. That combination separates an active moisture problem from a historical one, which is the difference between a repair that holds and a repair that repeats. If there is a live leak or a drainage issue, that gets named as the first item of work.
Step 2: A Written Scope With the Repair Method Named
The estimate says which boards come out, which get a dutchman patch, how the new material will be sourced, and whether the area will be finished on its own or blended into a larger sand. It also says plainly where a perfect match is not achievable, because finding that out at the end is how repair jobs go wrong.
Step 3: Removal, Sourcing and Subfloor Correction
Damaged boards come out without collateral damage to their neighbors, and the subfloor underneath gets inspected rather than covered up. Soft or delaminated sheathing is replaced, low spots are corrected with self-leveling underlayment, and fastener schedules are brought back to where they should have been. Nothing new goes down over a substrate we have not looked at.
Step 4: Installation, Blending and Finish
New boards go in with the same fastener type and spacing as the original where the construction allows it, ends staggered into the field. On a site-finished floor the repaired area is sanded through the full grit sequence with the surrounding floor and finished as one surface. On a prefinished floor we set the new boards flush and handle the transition so the seam does not telegraph.
- 20+ Years Experience
- Free Written Estimates
- Dust Containment on Every Sand